PT1101E Lecture 2.
Levels.
Auto Contrast and Auto Levels sometimes clip highlights and shadows.
Levels is the manual version of these auto functions.
Image>Adjustments>Levels.
Shift the 2 side pointers to where the tone distribution first start and end.
The middle pointer adjusts the midtones without affecting the highlight or shadows.
Eyedroppers are for us to manually choose darkest/white/grey points. Eyedropper in grey point can be used for overall colour change.
Curves.
Image>Adjustments>Curves.
CLicking and dragging the line creates anchor points.
Pulling it up lightens the midtones, and dragging it down darkens the midtons.
Adding more anchor points creates more complex shapes.
Remove achor points by dragging them off the graph.
Until now, i still can't use curves well. It's takes practice, and it relies solely on what we see the on-screen preview. I guess i still don't trust myself very much.
Color Balance.
Image>Adjustments>Color Balance.
But usually I don't know what is it with the picture that I want to change.
Hence, Image>Adjustments>Variations.
I think this function is super cool. It allows previews of all changes possible, and you can adjust the level of fineness too. wow.
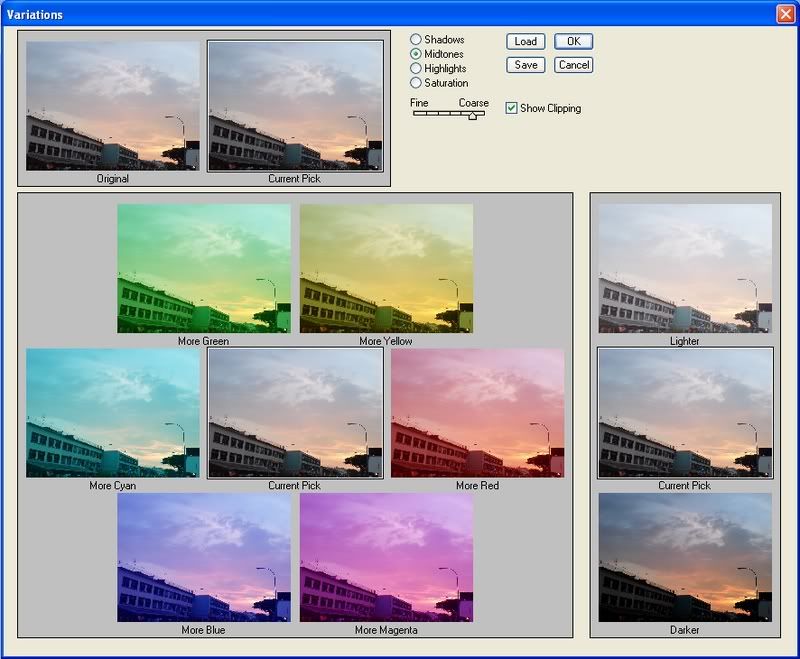
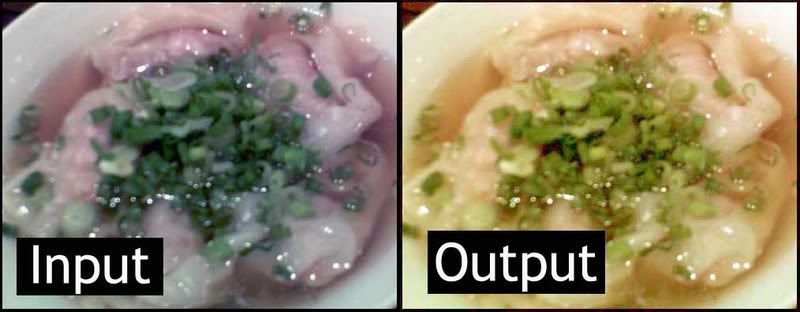
某人's picture. edited it using variations. =X
Hue and Saturation.
Image>Adjustments>Hue and Saturation.
Pretty self-explanatory.
Hmmm, let's end with something more interesting.
Paint and texture.
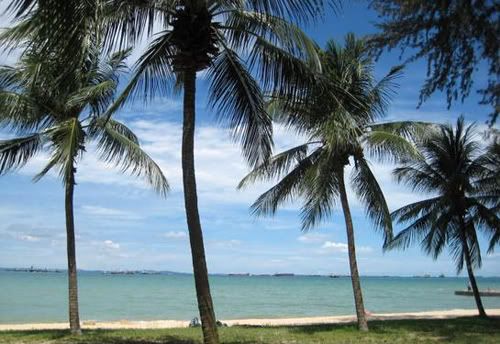
The sky, the beach and some sand.
Filter>Artistic, etc.
One of the first features I started playing around with. =)
Try to choose pictures with less detail, cuz much of which will be lost.
Some tips...
ONE: Lighten images for a more realistic watercolor.
TWO: Combine paint effects with texturizer. Filter>Texture>Texturizer.
THREE: Create an edge around the image. How? Hee. To be continued...
Tah-dah~!
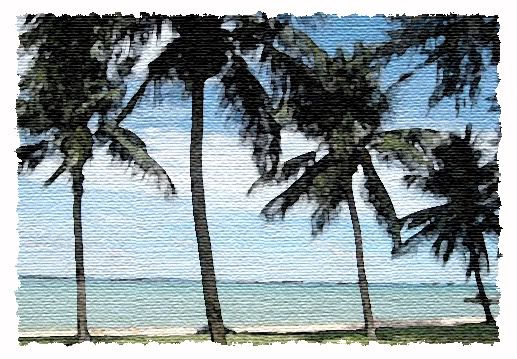
Washed-out the image using levels. Apply watercolor. Texturize with canvas. Created an edge for more realism.
That's all for now! =D
Levels.
Auto Contrast and Auto Levels sometimes clip highlights and shadows.
Levels is the manual version of these auto functions.
Image>Adjustments>Levels.
Shift the 2 side pointers to where the tone distribution first start and end.
The middle pointer adjusts the midtones without affecting the highlight or shadows.
Eyedroppers are for us to manually choose darkest/white/grey points. Eyedropper in grey point can be used for overall colour change.
Curves.
Image>Adjustments>Curves.
CLicking and dragging the line creates anchor points.
Pulling it up lightens the midtones, and dragging it down darkens the midtons.
Adding more anchor points creates more complex shapes.
Remove achor points by dragging them off the graph.
Until now, i still can't use curves well. It's takes practice, and it relies solely on what we see the on-screen preview. I guess i still don't trust myself very much.
Color Balance.
Image>Adjustments>Color Balance.
But usually I don't know what is it with the picture that I want to change.
Hence, Image>Adjustments>Variations.
I think this function is super cool. It allows previews of all changes possible, and you can adjust the level of fineness too. wow.
某人's picture. edited it using variations. =X
Hue and Saturation.
Image>Adjustments>Hue and Saturation.
Pretty self-explanatory.
Hmmm, let's end with something more interesting.
Paint and texture.
The sky, the beach and some sand.
Filter>Artistic, etc.
One of the first features I started playing around with. =)
Try to choose pictures with less detail, cuz much of which will be lost.
Some tips...
ONE: Lighten images for a more realistic watercolor.
TWO: Combine paint effects with texturizer. Filter>Texture>Texturizer.
THREE: Create an edge around the image. How? Hee. To be continued...
Tah-dah~!
Washed-out the image using levels. Apply watercolor. Texturize with canvas. Created an edge for more realism.
That's all for now! =D
标签: photoshop
发贴者:me-myself-i 时间
4:35 下午
![]()


2 条评论:
Wow Jesse! That's amazing. =)
It's like magic.
哦。。。
赞哦!
几天没来了。
一来就是看不完的日记。
好期待 PT1101E Lecture3
发表评论
订阅 博文评论 [Atom]
<< 主页